7/30/11

Mac OSX Lion - A few Finder tips and Tricks

Show Status Bar in Finder Windows

The new Mac OSX Lion operating system has a lot of new features but looks enough like the previous version of the operating system to throw you for a loop if you expect to see something and it isn't there. A great example of that is hard disk information.

In 10.6 Snow Leopard, at the bottom of every Finder window is a list of how many items are in the window and a total of the space available on whatever disk the window contents are located on.

Finder.jpeg

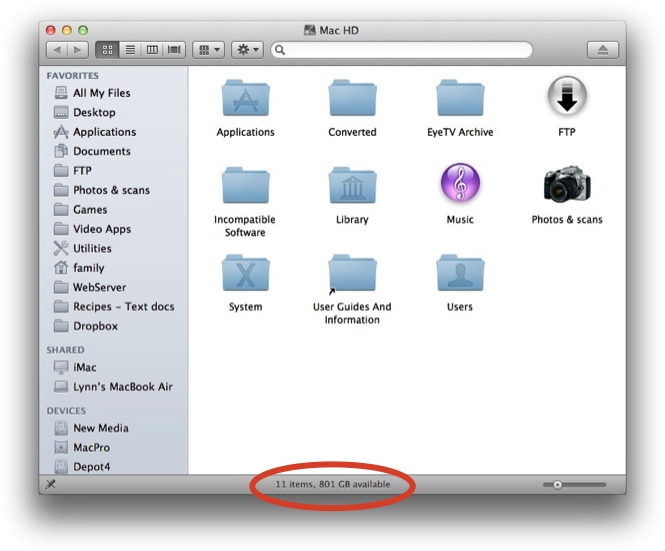
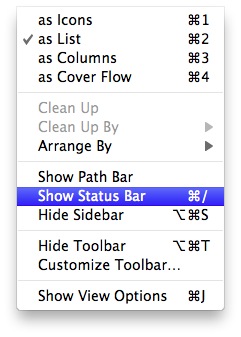
By default Lion doesn't show this information. To get it back select the finder window, go to the top of the screen and select "View". Then select "Show Status Bar." That's it!

Show_Status_Bar.jpg

Change Finder Sidebar Icon Size

Another change that Lion sets by default is the size of the icons in the Finder window sidebar. Here's a picture of the Lion sidebar showing the default size

Sidebar Med.jpeg

To save a little space you can adjust the sidebar icon size using System Preferences. Just open System Preferences and go to General. Just change the sidebar icon size to small.

Sys Pref Sidebar.jpg

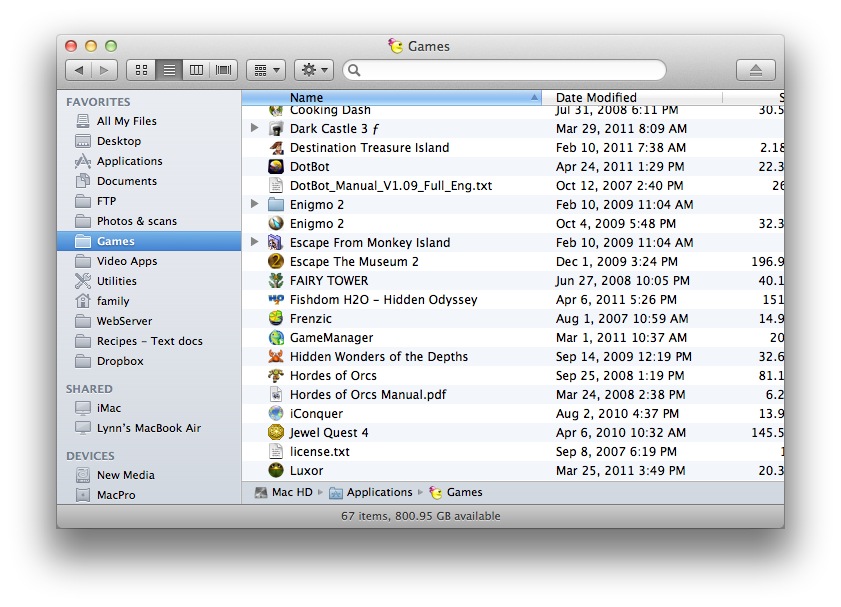
Now your Finder windows will look like this
Sidebar Small.jpeg

Configuring Finder Sidebar

The Finder sidebar also now contains a bunch of new icons and by default it's missing some old ones. To change that configuration you just need to click the background to bring up Finder then open Finder Preferences.

In the Sidebar menu you can add or delete menu items. For me, showing the machine Hard disks as well as other connected servers is a must so just check the appropriate Devices & Shared items. You can also add or delete folders you want to have at your fingertips whenever you open a finder window.

Finder Prefs.jpg

What is the same as older versions of Mac OSX is the ability to add items to the sidebar. Just drag folders you want to display to the sidebar and they will always be available for easy access.

Sidebar Games.jpg

The best thing to do with a new operating system is to explore and test things out. See if you can find a new function or option that you love (or hate) and drop me a comment below to let me know. I'll try to share some of the best so everyone can benefit.

7/25/11

Mac OS Lion - Creating a Lion Boot/Install Disk

One of the new "features" of Apple's new Lion operating system is it's total lack of physical media. The only place you can get Lion is to download it from Apple via the App Store. That's great for Apple as it saves the cost of creating, packaging shipping and displaying the boxed media. For the end user it's a mixed blessing.


It's great because you always know where to go get another copy. No more searching for your install disk. Just log into your Mac, fire up the App Store and download it again. The down side is that if you have a slow Internet connection or you have a lot of family Macs to load (you can install Lion on all your machines using your AppleID) it can take a while. If you have 4 or 5 Macs in your family like I do then downloading that 4GB file over and over again would be a real pain in your ethernet. To help you get around that problem you can download it once then create an install disk. 


Here are the steps to creating a Installation DVD. You can follow the same basic steps and also create a bootable flash drive if you want, just make sure it's greater than 4GB in size.


  • Purchase and download Lion from the Mac App Store. When downloaded it will be added to your Dock and Applications folder. Make sure you don't install Lion! Instead close the installer.

  • Go to the Applications folder and locate the Install Mac OS X Lion package.

  • Right-click the installer and choose Show Package Contents. 

    • Go to the /Contents/SharedSupport/ folder and locate the InstallESD.dmg disk image.

    • Drag "InstallESD.dmg" to your desktop


    Now you need to create a Boot DVD 


    • Open Disk Utility. 

    • To burn the image to DVD, click the Burn button in the Disk Utility toolbar and select the "InstallESD.dmg" file you dragged to the desktop . Insert a blank disc when the burn dialog displays, and then click Burn (be sure to have Disk Utility verify the burn to ensure the media works as it should).

    • Now you can take your disk to all your Macs and update to Lion. When you are done, just make sure to store your disk somewhere safe.


    7/23/11

    Mac OS 10.7 Lion


    Since this is a Mac blog & you are reading this post I figure you have heard that Apple released a new operating system last week; code name Lion. This is the seventh iteration of their OSX operating system and it's got a lot of changes in it. Most users will be happy with the changes but as with anything new, it might take a while to adjust to the changes. If you haven't upgraded yet you need to make sure you are prepared.


    The first thing you can do to get ready is weeding out all those unwanted applications and data and doing a general clean up. Then, after you're done cleaning up do a backup. You do backups on a regular basis don't you?  If not, you can read through my posts about backups here and here. As a general rule ALWAYS do a full backup before a major OS upgrade.


    The next step may be painful but stick with me. Lion is a new OS and is getting rid of some of the old legacy code. That means some of your older applications may stop working. If you count on an application in your day to day computing life then it's good to check to make sure it will work after you upgrade.


    Back before Apple switched to Intel as the Mac CPU of choice they used chips made by IBM/Motorola called PPC (short for PowerPC or Performance Optimization With Enhanced RISC Performance Computing). That means appications that you rely on might stop working when you upgrade to Lion. To keep from shooting yourself in the foot it's a good idea to check before you upgrade. Here's how to check for PPC apps on your computer:


    Go to the Apple menu and open "About This Mac."  


    When the window opens click on the "More Info" button. That will bring up the system profiler application. Click on Software and sort by kind and you will see a list of all your applications. Those that are "Universal" or "Intel" will work fine in Lion. Anything that is PPC will not.

    If your favorite app is listed as PPC it might be time to find a replacement or see if an upgrade is available. For me that meant finally abandoning my old version of Quicken 2006 (yeah I was too cheap to even upgrade to Quicken 2007). Just know that the new upgrade for Quicken 2006 & 2007 , Quicken Essentials for Mac, doesn't have the same features as the much older version. I don't know why Intuit is so slow to upgrade the Mac version to match the Windows version but they haven't. Here's a good article about Quicken Essentials and some of its shortcomings.  


    That's just one bad example. Most of my day to day applications just needed an upgrade and they are Lion ready. I did loose some of my old games but that's life when you hang onto a game that's over 15 years old. Here's a quick look as some of the major players that are PPC:


    • FileMaker 6
    • FileMaker 8
    • Older Adobe software
      • Photoshop CS1, CS2 etc
      • Creative Suite older versions
    • Microsoft Office 2004

    After you weed through and delete your old data and applications, you check for PPC applications and upgrade or replace them, and you do a backup, you should be ready to update your computer to Lion. I'll review that upgrade process next.


    My plan is to offer up some tips and insight on Lion over the next few weeks. But that may get stretched out since the weather here in Seattle is finally improving and the weatherman says the temperature might actually reach 80°!!!  After living in perpetual fall-like drizzling rain and cloudy days for the past 11 months it's tough to spend time in front of a computer.