2/20/13

Continuing Adventures with iTiVo

Getting shows off Tivo and into the Apple environment has been an adventure. I first blogged about a method using an application called iTiVo. It was a basic straightforward method that was easy to use. Then iTiVo broke when I updated to OSX 10.8 Mountain Lion. 

Because I still wanted to watch my shows on my AppleTV, iPhones and iPad I wrote up a work around that actually works well. It had a few hicups but once you get things set up it you are back in business. Then iTiVo got fixed! Hallehluya!  I could use the original iTiVo method again. 

But now, as of 2/20/2013, iTiVo broke when Tivo updated their software. When you try to download a show you get an error that says "Couldn't Download 'show name'"


The good news is that once again the iTiVo community  has a work around that will fix it. 

The fix involves using the Terminal app and some editing of some resource files inside iTiVo. Don't worry, it's nothing too difficult. The first thing you will want to do is download the latest iTiVo application and make a copy. Always, ALWAYS work any edits to program resource files on a copy. That way if you mess up you don't have to re-download the application. Once you have downloaded and made a copy we can start the edits.

Open Terminal and type in this command: 

curl -c ~/Documents/cookies.txt -d "tivo:MAK" http://tivoip:80

(replace "MAK" with the Media Access Key and "tivoip" with the ip of your tivo). To find out the IP address of your Tivo you can look at my previous blog post which uses LanScan from the Apple App Store. Your command might look something like this:

curl -c ~/Documents/cookies.txt -d "tivo:9876543210" http://192.168.2.20:80

This command will output a file called "cookies.txt." that will be placed in your home directory in the Documents folder. Once you have run the command, you will need to edit the cookies.txt file. Of course, before you do that you will want to MAKE A COPY

Open your Documents folder in your home directory and find the cookies.txt file that you just created and duplicate it. Call it something like cookies_ORIG.txt. Now edit the file called cookies.txt using your favorit text editor (Text Wrangler, Text Edit or even VI) . It will look something like this.


The problem that iTiVo is having is caused by an expired cookie. The "1360972800" in the cookie.txt file is the number of seconds past the beginning of the world. And as every geek knows the beginning of the world started on January 1, 1970You will need to change that value to something much larger. I just changed the first 1 to a 2. Now save the file. 


Now that you have your updated cookie file set up you need to edit the iTiVo resource file to point to it.  Find the copy of iTiVo  you made and right-click, and click "Show Package Contents". 


Go to Contents folder and drill down to the Resources folder.  Find the file called "http-fetcher.pl" right-click it. Using the "Open With" command  open it in Text-Edit or other editor. Find the long line of code that has this in the middle of it:


...... -c /tmp/cookies.txt --retry 12....

You will need to update the cookies.txt location to show the new /Users/'home folder'/Documents/cookies.txt" location.  Make sure to update the line with your information by changing  'UserID' to your user account. Don't for get to change the flag from "-c" to "-b"


...... -b /Users/UserID/Documents/cookies.txt --retry 12....


Then re-open iTivo and it should start working again!

2/17/13

Cron - The GUI way

In my last blog post I showed how to write a simple script to record your external IP address. Then, using cron, how to schedule that script to run on a regular basis. The hardest part of the whole exercise was editing the crontab file using the VI editor. How about I show you an easier way to edit the crontab file using CronniX.


CronniX is a great GUI (graphical User Interface) front end to the cron function. When you open CronniX you will see a list of your current crontab file.

If you click the "New" button in the upper left you can enter in a new command.


You are greeted with a non-functional example screen but choosing either the Simple or Expert tab to enter your interval and command is a much easier way rather than using weird UNIX keystrokes on the command line. 


If you want to make sure the end result will run when you want it to check out this web page. Enter in when you want things to happen and it will output the correct crontab entry so you can see what it should look like.  It's a great web tool to check your crontab file and ensure it's doing what you want. There are other GUI cron editors out there so if CronniX isn't for you feel free to check out Crontooie, or Lingon.

Give Cronnix a try the next time you want to schedule a recurring or one time job to run while you are away from your computer. 


2/12/13

Know Your External IP


My name is Bruce and I'm a UNIX geek. There, I've said it. Maybe it's my start to a 10 step program but I hope not. I like my addiction. The thing about being a UNIX geek is it's fun to figure out how to do something behind the scenes using terminal or your favorite text editor. Somethings you look for a problem you don't really have just to try to fix it using the command line. For me I wanted to find a way to identify my external IP address so I could access my computer remotely.

If you are away from your computer and want to access it how do you do it? Apple has built in Back-to-My-Mac or Screen sharing. There are also tons of  Mac VNC apps (Chicken of the VNC, JollyFastVNC, TeamViewer, etc) or iOS connection apps (VNC Viewer, Remotix, LogMeIn, etc.).  Whatever the interface or OS they all have one thing in common, they need to know the IP address of the target machine. Without that you don't know where you're going.

Some of the VNC apps, most that charge you money, will configure your target Mac with a small background app that registers with their server and records the IP address so you don't need to worry about it. You can also use a service like Dyndns to register your machine for free but they have changed their set up so your hostname will expire every 30 days unless you upgrade to the pro version (which costs money). So what do you do if you're cheap and don't want someone else to keep track of the address? How do you do it yourself and make sure you know an address that can change at any moment? This is where the fun with UNIX begins.

This example assumes you have a free cloud service like dropbox. You need a place to record your IP address that's available to you when you are away from home. You need to be able to update that file on a regular basis so if your IP changes you can record it. That means you need a UNIX script to run at regular intervals and record your IP address. To do that you will use a UNIX application called cron.

Every flavor of UNIX, including the BSD core that Mac OS uses, has cron. It allows you to schedule jobs using to run when you want. Any time of day. Any day of the week, month of the year and anything in between. The data for cron is stored in the crontab file and by editing this file you can set a script to run. Each user has a crontab file that cron looks at when you log in. To see your own file type the following at the command line.

crontab -l return

You will either get a statement that your crontab file is empty or it will show you what's currently in your crontab file. If you are like most people you will just see a header line starting with the pound symbol. 

To set up our IP address recording script you will need to edit this file. UNIX is very picky about how things are set up and edited so you will need to use a command line editor like EMACS or VI. Sounds scary but I'll give the exact keystrokes to make it work using the VI editor.  Make sure to type EXACTLY what is written! I will use bold in red for hitting the return key or other command keys. 

crontab -e return

You should see something like this on the screen

Now just type the letter "o" without hitting the return key. That's the  "oh" key not zero. Again, Don't hit return. The "o" is short for "open". Now your cursor should be on the next line down.

Now is a good time to tell you how to get out of things if you mistype or screw up. At any time you can hit the "esc" key ( the one in the upper left corner of your keyboard) and type 

esc :q! return

This says to escape to the VI command line and quit without saving. You loose your edits but your file doesn't get hosed up.

So... back to editing the file. After you have done the "crontab -e" command and opened a new line you can type the following. Make sure to replace "UserID" with your own Mac userID. Obviously, if you have placed the default dropbox folder somewhere else you would enter that path instead.


0 0,12 * * *  date | awk '{print $2" "$3" "$4}' > /users/UserID/Dropbox/IP.txt;curl -s http://checkip.dyndns.org | sed 's/[a-zA-Z/<> :]//g' >> /users/UserID/Dropbox/IP.txt


This command is all on one line with no returns. Also, a special character worth noting is the pipe  "|" character. It is located just below the delete key, above the return key. The pipe symbols says take the output of one part of the script and use it as the input of the next part.

I won't parse the whole line for you but basically the cron will run mini-script at noon and midnight every day of the week.  The script will record the date and time and write it on the first line of your text file (IP.txt) that is located in your dropbox folder. Then run a check using "checkip.dyndns.org" to find your external IP. It takes what the website returns, gets rid of the garbage and only keep the IP address and writes that IP to the IP.txt file.

Once that's done with your typing you need to save your file.

esc :wq return

That command writes the file and quits. Once you are back at the main command line you can check your work by retyping the crontab list command.

crontab -l return

You should now see the file with your added line.

Another command worth noting. If you mess up and save the file with a typo or other error, you can clear out the file using the following command at the UNIX prompt and start all over.

crontab -r return

But if you are careful you shouldn't need to use that command. If everything goes well you should now have a file in your dropbox folder that you can check to find out the external IP address of your computer.

Now for a shameful admission. Do you remember when I said sometimes you look for a problem you don't really have just to try to fix it using the command line?  Well, just so you know, if you have dropbox you already have access to your external IP address.

Open any web browser you can find out the external address of any of your currently connected devices. Go to the dropbox web page and open up your settings.


Choose the "Security" tab and you will see a list of all your devices. Hover your mouse over the information icon for any of your devices.


Guess what?  You now know your external IP without using any UNIX at all and it tells you the last time it was updated. But where's the fun in that?


2/10/13

Key Ring an Alternative to Passbook

When Apple's iOS Passbook was announced I knew Apple had another hit on their hands. Being able to slim down your inch think wallet by getting rid of your reward cards, membership cards and gift cards would be wonderful. Too bad the reality didn't match the promise. To me Passbook is one of those applications with great potential but just doesn't match the hype. Don't get me wrong I love the idea of Passbook I just think that right now, the better digital wallet is Key Ring.


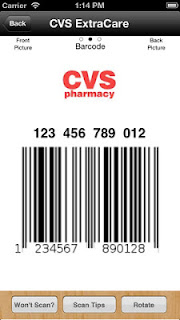
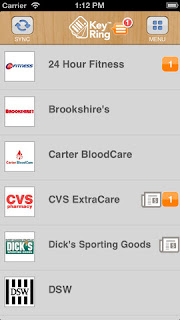
Key Ring is an iOS app that allows you to ditch all the paper and plastic and store all your rewards cards, coupons, membership cards and gift cards digitally. Unlike Passbook, you can easily scan your existing barcodes and add them to your key ring with a minimum of a hassle. You also can set it up to receive digital coupons from your favorite retailers and automatically add points to your reward cards. But the main feature for me is Key Ring's ability to store any type of card that you want to digitize.


First a clarification; Passbook will allow you to add your own card but it's difficult. You need to visit one of several web sites, register with them and then hope the vendor you want is listed.


Most of the sites are also geared toward merchants, not to the customer. PassSource, PassTools are two of the better sites so give them a try. The biggest drawback is that Apple's Passbook application only allows you to use only 2D types of barcodes (Aztec, BDF417 & QR). If you have a membership card with a numeric or alpha numeric barcode you are out of luck. So what the heck does that mean you ask?

Open your wallet and pull out one of your loyalty cards or a coupon. If the barcode is just a bunch of lines then it's either a numeric or alpha numeric barcode. If the barcode looks like a bunch of squares jumbled together then it's a 2D Barcode.


If you are interested you can read more about barcodes here.

So let's use an example from real life. The Seattle area, where I live, is currently rated number 2 in the country as the most literate cities in the US. One of the factors for literacy is the number and usage of libraries. Like a lot of families, everyone in my family has their own library card and can put books on hold. That means that when someone stops by the library to pick up books they need to know every card number and PIN for every member of the family. Rather than copy each card or write down the numbers use Key Ring.

Open the app and from the main menu select "Add Card." Lay your card in front of you and scan the barcode


You can now enter in details about your card. Choose "Select a Retailer" & Key Ring will give you a choice of Loyalty Card, Gift Card or unknown. Choose the card type and scroll through the provided list and select your card vendor. In the case of my King County Library System (KCLS) card I choose unknown for the card type then choose "Other Retailer Not Listed" from the provided list. I input "KCLS" For my title and under description input "library".


If for some reason you need to need to edit the barcode you can. You can rescan your existing card or just edit the number. If you know it, you can even change the barcode type and choose to hide beginning and trailing digits. 

Because I happen to know that KCLS uses codabar with a mod 10 check digit I made sure that "codabar" was selected in the list and the first and last digits were hidden.  More then likely you wont need to do this step. But it's nice to know you can if you must.

Once you are done with any edits you can hit the save button and you are finished. 


The rest of the app is very straight forward. There are tips for how to make sure your newly created card will scan correctly, registration for backing up all your cards and even an "offers" list for online bonuses and sales. 

If you are like me and your wallet is thick with extra cards and you want to ditch the extra weight, then this app is a godsend. It will allow you to quickly store all your data in one location for fast access and safe storage, and you will never again forget your cards at home (unless you forget your phone). Give it a try and let me know what you think.