11/14/15

UPS Battery Backup - Get one!

I live in a nice suburb of Seattle in a neighborhood that's not too old. You would think the utility infrastructure would be able to handle a storm or two without a power outage. Unfortunately that's not the case. That's why I bought an Uninterruptible Power System (UPS) system. If you value your computer you may want one too.


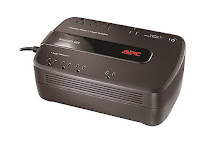
For computers & electronics, the sudden loss of power or power surges can cause a lot of damage. If you have a cheap power strip you may be protected from electrical surges, but they offer no protection against drops in line voltage, brownouts, blackouts, and other power supply issues. A true UPS system will protect your system from surges as well as these other issues.
My home has experienced several major outages and one very bad voltage surge. When the surge happened it burned out a lot of electronics before my breakers tripped. I lost a lot of electronics that I never thought of protecting: Garage door openers, sprinkler control box, oven electronics, etc. But I did protect my computers so thankfully those came through unscathed. The sad part is that even though my computers were safe my data wasn't so lucky. The sudden shutdown corrupted my HD. Call me a one trial learner. That next week I purchased a UPS system. 
There are a lot of sites out there to help you decide what to buy but basically it comes down to -

  • How much capacity do you need?
  • How much runtime do you need/want when the power is out?
  • Should you buy a pure sine wave UPS?
  • How many devices should you include on your device?

I won't bore you with how to calculate your max power or Amp-Hour requirements. There are plenty of sites that will help. I will briefly touch on the Sine Wave issue ... Make sure your UPS has it. 
This site covers the details well but modern electronics need clean sinusoidal power to work. A simple square wave approximation may not be enough. 

So once you have your UPS sized, picked out, ordered and unpacked what do you do? Well, first you plug it in and attach all your devices. The batteries will charge up quickly and you are ready to go. But there is one last step. Using OS X to control what to do when the power goes out.


OSX has a nice feature in the System Preferences that automatically shows up when you attach a USB cable from your Mac to your UPS. After connecting your UPS system via USB open System Preferences and go to "Energy Saver." You should now see a new tab titled "UPS"


Select the "Shutdown Options" to configure what to do in the event of a power outage.

Set the options the way you want them and select "Done". Now you are protected! In the event of a power outage your Mac will control all the peripherals attached to the UPS and shut down using the parameters you set. However some other smart devices can also control your UPS systems. In some cases you may want a NAS or other device to decide on your shutdown options. 

Here's a Synology NAS control panel option that shows it's UPS configuration set up.


Whatever device you use to control your UPS make sure you set it up so you are fully protected. A good UPS for a home computer set up will cost anywhere from $80-$250. It's cheap insurance to have to protect your computer. Computers cost money but can be replaced in most cases it's your data irreplaceable so protect it!


10/23/15

Slow Mac - What's going on?

Recently I've had two instances where my Mac just wouldn't respond. It was frozen. I clicked links and typed commands, but nothing would work. Since I run a great application called iStat Menus I could tell my CPU was running at maximum and I didn't have any resources left to do what I wanted. So how do you figure out what's going on and what do you do?  Good question! I'm glad you asked.


Apple provides a great application called Activity Monitor. If you have never used it, it's located in the utilities folder. It will show you all of your open applications and running process, how much CPU they are using, the amount of RAM being consumed, energy used as well as disk and network activity. 

In my case I found that a process called "storeassetd" was using 99% of my CPU. A lot of digging around the Internet finally revealed that this process is associated with the Apple Mac App store. looking at it, I guess the name makes sense. Somehow, when I was updating my Mac applications, the App store process didn't stop when I quit the software update. 

To fix the problem and stop the runaway activity you just highlight the application and click on the stop sign icon in the upper left.


The second instance of runaway CPU was a little more nefarious. I was being attacked by a hacker.


Again I was investigating why my Mac was running slowly and discovered that this time the responsible process was "opendirectoryd"  Being a UNIX admin I knew this was the LDAP login authentication process UNIX uses...WTF? This is where Apple's Console application comes in handy. 

Console is the application that allows you to look at all of the log files the Mac keeps. I fired up Console, did a little digging and found this:


Page after page of someone trying to log into my Mac as root. Hundreds of attempts per second!! No wonder my poor Mac was having trouble. 

I realized what had happened almost immediately. The previous week I had needed to access my Mac while away from home and had allowed remote login in the System Preferences Sharing configuration menu.  Since I have multiple Macs I had also set up my Airport router to forward all ssh requests to my iMac so I could log in to the correct Mac. The fix was just as easy. Shut down the ssh port on my Mac and remove the Airport Port forward using Airport Utility.

The moral of this story is to be vigilant. If you have a problem, if your Mac is running slowly and you don't know why, do a little investigation. It could just be a hung application (like my App Store process) or it could be something much much worse.

10/7/15

iTunes - Where is that Song?

I recently posted about some of the annoyances of iTunes. Today I want to follow up with another point of frustration: How to search for a song and figure out which of your playlists it's in. 


One of the great things about iTunes is creating the perfect playlist. And if you have a lot of playlists in your music collection it can be hard to remember which is which. My wife was trying to find a playlist and could only remember that it had this one specific song in it. So she did what all of us do and searched for the song. ... No dice.

She poking and prodding she turned to me and said "This is horrible! Why can't they make it simple to list out all the playlists that have a specific song in it?"  We tried asking Siri and she just got confused. The answer is a keystroke away.

Bring up iTunes, select your music library and search for a song. 


Hold down the "Control" key and click on the song. Near the bottom of the list you should see "Show in Playlist." Click on it and it will show you all the playlists your selected song is in. 


If "Show in Playlist" isn't visible it just means that song is not a part of any playlist. Who know searching could be so easy? 

Let me know some of your iTunes gripes in the comments below. Who knows? Maybe there's a simple solution.

10/1/15

iTunes Annoyances - Let Me Count the Ways

iTunes started life as a great little app to play music. Over the years it has grown to gargantuan proportions and handles all of Apple's media as well as acting as a portal to the iTunes store. To me iTunes is bloated, over weight and needs a diet. Since that's not going to happen for a while I've decided to address some small but niggling issues and maybe help someone keep from pulling their hair out. Today I want to address a problem that plagued me when I started using iOS 9 on my new iPhone 6s

I work out to music and I suddenly ran into a problem with playlists. The first song repeated over and over. I could not get the next song to play. Hitting the couple arrow icon just started the song over again. 

First I wanted to see what my playlist had "Next Up" so I hit the three lines to the right of the play icon.


It showed me nothing but endless repeats of the same song. 


The solution is as simple to fix as the problem is to cause. When playing music the main screen has a to "arrow" icons at the bottom of the screen. One for "Shuffle" and the other for "Repeat."  Can you see the almost too small to read numeral "1" on the "Repeat" icon below? That means the selected song will play over and over and over... until you are sick of it or change the settings.


To stop this aural assault you just tap the same icon until the little "1" & the grey box around it goes away. BTW - The grey box is a visual signal that this function is selected. In this case if you select the "repeat" arrows and only tap once the grey box will be shown but no number. This means the playlist will repeat. Tap again, and the number 1 will appear and that song will repeat. I figure since the Home button on my iPhone is so close to the repeat icon in iTunes I inadvertently selected it without knowing it. 

Over the years Apple has tried to improve iTunes but it's still filled with small buttons which I am clueless to explain. If there were only one or two unknown buttons it wouldn't be so bad but every update of iOS or iTunes brings more changes and more new icons. If you add in the new Music service, old Playlists, Genius Playlists, Shared libraries and other functions things get confusing in a hurry. 

I hope this helps relieve some of the frustration out there. Write a comment and tell me your frustrations with iTunes. I'll listen, and just maybe, Apple will too.


9/30/15

Mac OS 10.11 El Capitan - Where did my Widgets go?

El Capitan the new Macintosh OS was released today and there are a lot of things to like. Unfortunately there are also a few annoyances. Today I want to address Widgets. 


You remember those don't you? They are the mini-applications that sit on your Dashboard. Apple has a whole page devoted to them here.  They first appeared in Mac OS Tiger in 2005. You normally access them when using a key command or gesture (swipe left using 3 fingers). They appear on a secondary desktop.


Well Apple has decided they aren't important and has turned them off by default. If you are a Widget user, however infrequent, you can turn them back on in System preferences. Just open up preferences and navigate to "Mission Control"


Make sure "Dashboard" Is turned back on. I am used to having all my widgets on a separate space so that's the pick I made. Close up Preferences and you will have your Widgets back. 


Based on this change I can only suspect that Widgets may not be around much longer. But for now, you can have your El Capitan and Widgets too.

8/28/15

iOS - Adding Emergency Information

Every year iOS is updated with great new features and awesome new programs. I'm sorry to admit I don't always take the time to explore every feature and every new app. Today I want to remind people about an Apple app that came out a while ago, Apple's Health App.  Like me you probably moved it to iOS purgatory on the last page of your iPhone applications  screen but you may want to take another look.


Most people think you have to have an Apple Watch to use the health app or it's only helpful  to track fitness, calories or food, but there is one great use for this application you might not know about, the ability to have personal information handy in case of emergency. 

My daughter recently got her drivers license and like every parent I worry about her when she is on the road late at night driving by herself. One small measure of comfort is know that If she were to get in an accident and someone needed her personal information or an emergency contact number, all they would need to do is grab her ever present iPhone (never used while driving of course!) and access the data from the lock screen. 

To set things up just open the Apple Health app and select "Medical ID" in the lower right corner. To create a medical ID just select the red "Create Medical ID" text and fill in the data. 


Apple has added a lot of basic medical information fields but you can also enter data in the notes section.  By default you can add medical conditions, allergies, medications you might be on, blood type as well as other personal information. You can also enter one or more emergency contacts. Make sure you have selected "Show When Locked" before hitting the done button.


Now here's the best part, when your phone is locked and someone needs to access this information they just need to select the "Emergency" button at the bottoms of the lock screen then "Medical ID" on the next screen.


Obviously this is information can save your life in the event of an accident but it's also extremely helpful if you loose your phone. Anyone who finds your phone can find a contact they can call to return your phone to you. 

Apple is great at adding little details that make your phone an awesome device to use. Medical ID is a well thought out addition that can literally save your life. 


7/1/15

USB Power Outlet - Amazon SALE!

One of my most popular posts is about a replacement wall outlet that includes 2 USB ports for charging your devices you can read about it here: Fastmac U-Socket USB/Power Outlet.

Since I first published that post way back in 2011 several other companies have come out with similar products. Today I just want to give you a heads up that Amazon is having a sale on the Leviton 15-Amp USB wall outlet with built in USB ports.


My Fastmac USB Outlets are still working great but you can always use more ways to charge your devices. With these outlets you don't have to hunt down your wall wart, you can just grab a cable and plug it in.

At $18.52 for Amazon Prime users, these outlets look like a great deal, go out and order several. They will be shipped same day for free. That's a deal!


6/30/15

Tech Tuesday - Old Technology

Today I've decided to start a less problem based series of posts about technology in general. After thinking about it for a while I decided to call it "Tech Tuesday." The alliteration works for me but I reserve the right to change the name to "Tech Thursday" if I don't meet my deadline. But for today, it's Tech Tuesday. 

For my first Tech Tuesday post I'll start with a question: What's the oldest piece of tech you have still laying about?


I have a vast collection of old routers, ancient network Ethernet Switches, printers, cables & miscellaneous old calculators.


I'm an HP RPN guy myself and rarely use my old HP 41C or 32S any more. My iPhone now serves as my go to machine when I need to work some math. If you are like me and find the default apple calculator lacking check out the Apple App store. It has a great collection of calculator emulators and including many HP-like RPN versions. My go to iPhone calculator is Free42. As it's name implies it's free and works well. It may not have all the programing functions of some of the more advanced emulators out there but, it's free. Give it a try.


As for working electronics I think I'm most proud of my old Palm Tungsten T3. It's rugged and well designed for it's day too bad HP had to go and ruin it. At this point it's worth next to nothing so for now I keep it tucked away. Who know's maybe it will be worth something some day.


So how about you? What do you have laying about? Do you still use it every day or even every month? Let me know in the comments. 


6/18/15

Apple Photos - How to Stop Autolaunch

One of my hobbies is photography. I love taking tons of photos and over the years I have developed a workflow involving Adobe Photoshop, Adobe Bridge and Adobe Lightroom. I used iPhoto and more recently the new Apple Photos, but not as my main go-to application. Therefore I was quite annoyed when each and every time I plugged in my iPhone or SD card Apple Photos would open. Here's how to shut that off. 


Open up Photos and plug in your SD Card or iDevice. Go to the "Import" tab and look at the upper left corner of the window. 


All you need to do is uncheck the "Open Photos for this device" box and Photos will not autolaunch when you plug in your device. 

The somewhat annoying part is that you will need to do this for each and every device you plug in. But once you have plugged them in and unchecked the box all should be well and Photos won't autolaunch.


BONUS Section

People tend to forget applications they haven't used for a while (or in some cases never even knew existed). Image Capture is one of those applications. 


Image Capture has been around a long time and is installed by default in the Applications folder.  You can use Image Capture to do all sorts of things including using a scanner, sorting your photos, quick emails or even make a contact sheet. You can also set what you want to happen when you plug in a SD Card or idevice. 

Find Image Capture in your applications folder and open it up. Once open look in the lower left corner of the window. You will see almost the same import configuration options as you see in Photos.


If you don't see the import pull down menu (shown in the red circle above) hit the very small arrow box in the lower left corner. That symbol is Apple's universal icon for "There's more stuff here if you hit me!" In this case it toggles the import view on and off. Once open use the pull down menu to set the application or no application to autolaunch. 

Using Image Capture also allows you to set the import location or what to do with the photos on import. Just use the "Import To" pull down menu at the bottom center of the window.


As you can see there are a lot of cool options, even build a web page! How easy is that.  

If you are a photographer and take even a modest amount of photos, getting rid of small annoyances, saving time and streamlining your work can really pay off. These tips may not make you a better photographer but they definitely help your workflow.

6/16/15

A Little Time Off - TARDIS Style

I decided to take some time off from blogging a while back but should get back to all things Mac shortly. It wasn't like I didn't have other projects going on though. Since my family loves Dr. Who, I thought I would share the TARDIS nightlight I just finished. Now I just turn it on at night to scare away all the Daleks and Cybermen hiding under my bed.


As a DIY project I'm sure it's been done to death but I figured it was going to be fun and interesting to see what I could do with it. 

I started with some plans I drew up and some materials. 


Some cutting, more thinking and many trips to the big box hardware store and I finished the basics. (FYI - Big Box hardware stores suck at small parts and accessories. I got almost everything elsewhere.) 


Add some glue and the classic outline was done. 


I fussed over the details of the call box sign. How do you make the text clear and readable? How do you make 4 signs that all match? Should I make the signs illuminated? A few  internet searches later I found a sticker place that will print your own custom made stickers. WOOT! 

A little Sharpie action, some pre-stained wood side panels and when all was done I ended up with this.


Several coats of "Tardis Blue" stain, a wash of black to add some depth and I had my nightlight. If I get around to it I'll take some night shots. The top light is clear acrylic that glows. The windows are frosted and covered with blue acetate to give a nice blue illumination. All in all, it works well and it makes me happy. Isn't that what's life is about?